

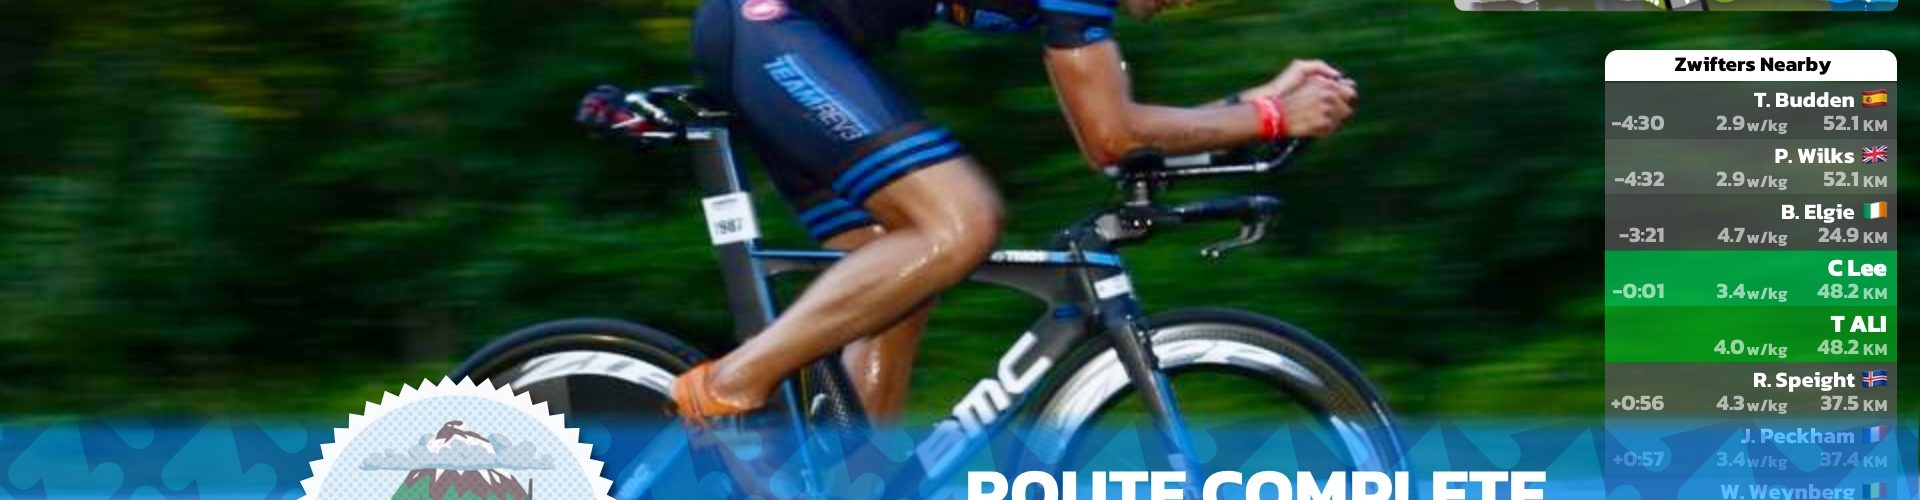
You’ve probably seen these Zwift route badge screenshots with real life or custom photos circulating on social media. Well, you can do your own as well.
Over last weekend, developer Phil Wilks came up with the idea and got a website up and running. The website is simple and easy to use.
Here is how to create your own Zwift Route Badge:
First you need to find a photo that you want to use. Preferably something in landscape mode.
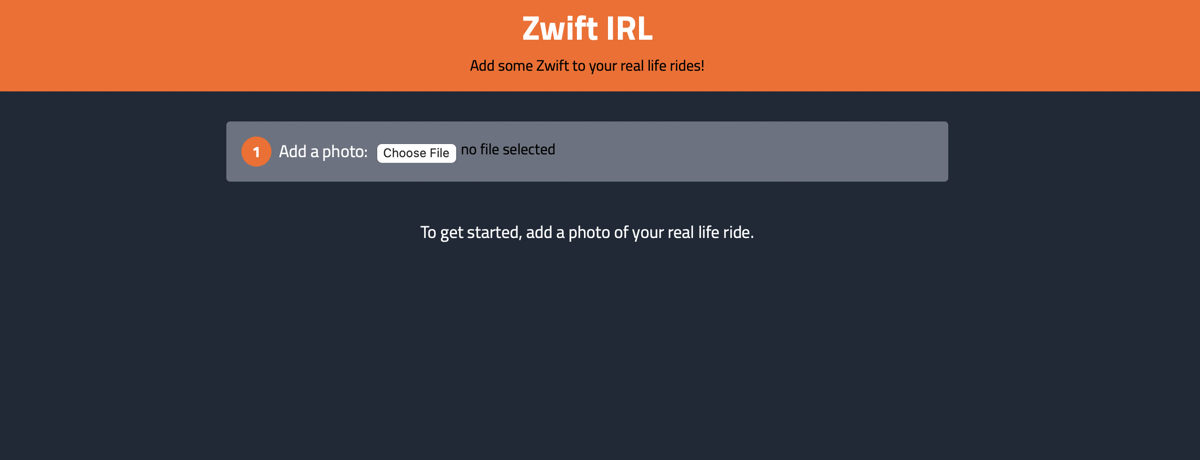
Go to ZwiftIRL.com. The website is simple and easy to use. You should see a box on top of the page with the option to select a photo.
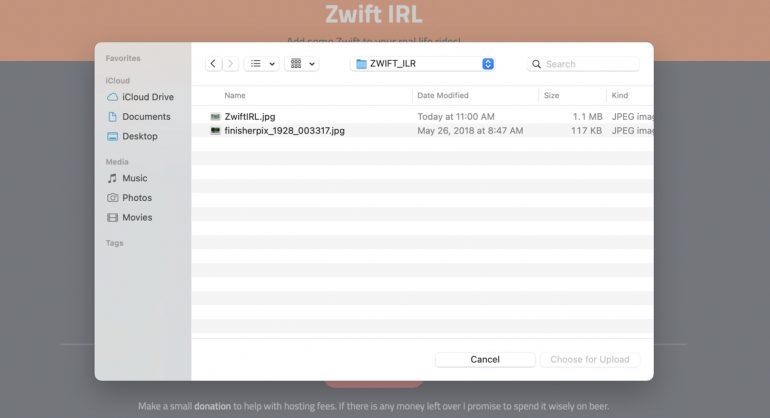
Navigate to the folder where you have the photo saved and select your photo. Click on Upload.
You should now see the photo you uploaded along with the option to customize it.
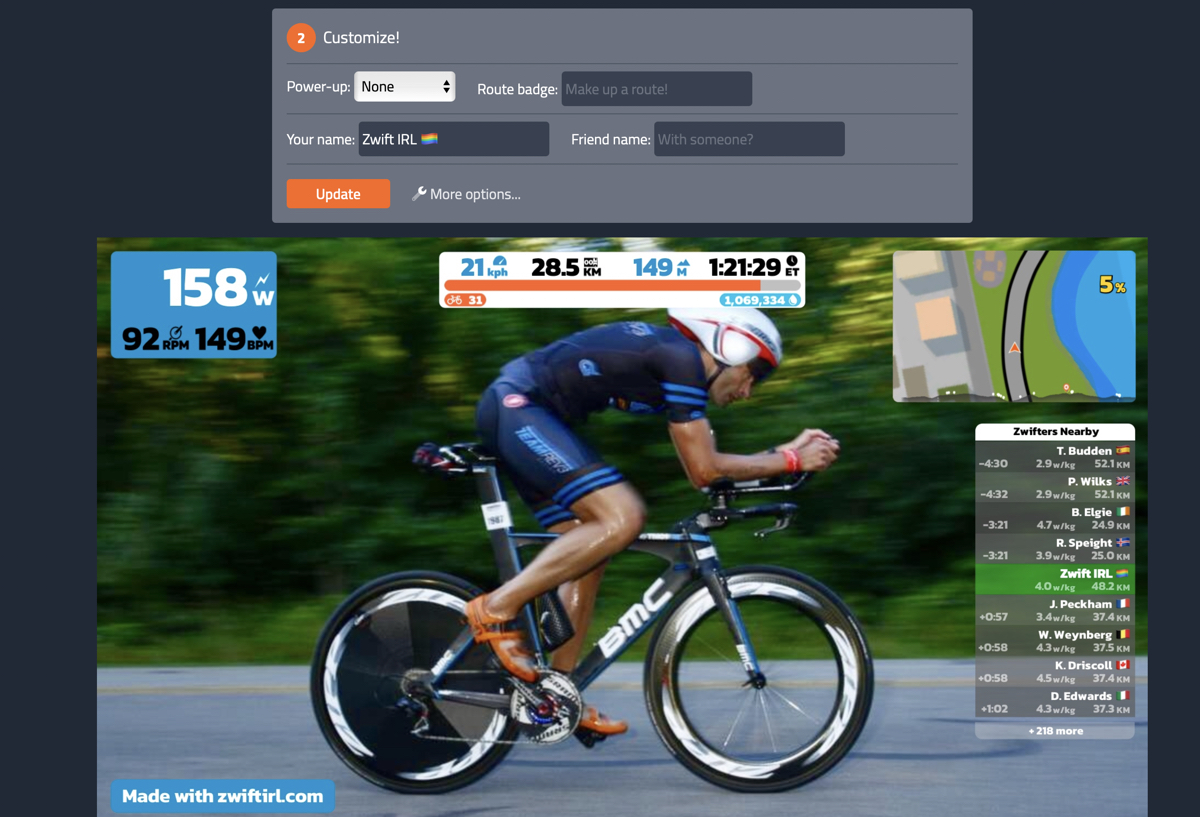
You can enter a Route badge, your name, and a friend’s name.

If you click on More options, you should see additional options to customize.
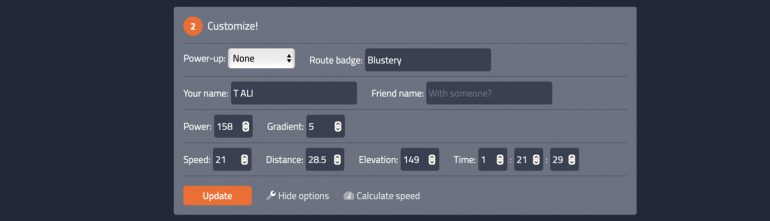
You can enter the power value displayed, time, gradient, and elevation. You can also change the distance and have it calculate your speed for you so you are not displaying the wrong information on your badge. There is no imperial option for us people in the U.S.
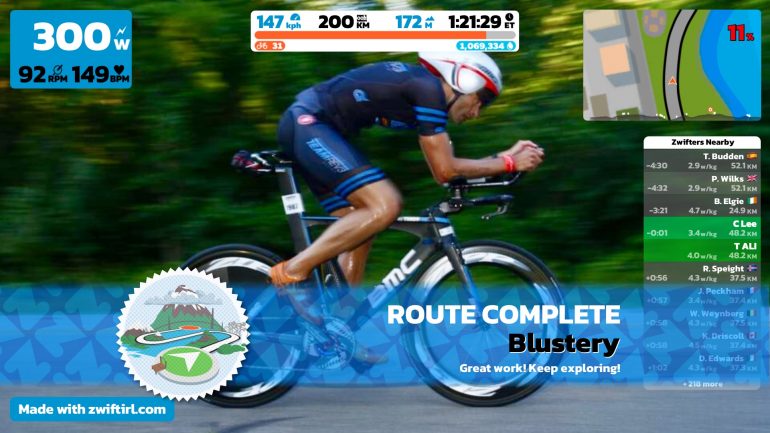
Once you are done, click on Update, and your information should be updated. You can then download your new Route complete image and share it on your social media account(s).
Did you create a meme? Let me know down in the comments.
Thanks for reading!