


Zwift running has been around for a few months now, and if you are not a cyclist or a triathlete, then you probably didn’t hear about it, and that’s because Zwift is mostly geared toward indoor cycling.
However, that is slowly changing and Zwift is planning on taking on indoor running just like it did with indoor cycling.
- You might also want to check out our Runner’s Guide to Zwift Running.
First, if you are not familiar with Zwift, let me give you a quick explanation of what Zwift is. Zwift is a virtual destination for people who love riding bikes. They took the boring indoor cycling routine and “GAME-IFIED” it, transforming the monotonous indoor cycling workouts into dynamic and social adventures and fun. Now they are trying to do the same with indoor running.
HOW TO RUN ON ZWIFT?
Luckily, you don’t have to spend thousands of dollars to get a new smart treadmill to run on Zwift, at least not yet. As long as you have a treadmill and running shoes, then you are halfway there. All you need to get is a footpod and a Zwift account.
EVERYTHING YOU NEED TO RUN ON ZWIFT:
- A treadmill
- A Footpod
- iPad/iPhone, a Desktop (Mac or Windows), or Apple TV 4th gen or 4K.
- Zwift subscription ($15/month)
BLUETOOTH OR ANT+?
The most complicated part about this is figuring out the equipment you need to connect to Zwift. Basically, you need to decide if you will be using Bluetooth or ANT+ to connect to Zwift. This will depend on your equipment and operating system. Zwift runs on desktop Mac or Windows, or iOS (iPhone or iPad). Android is in the works but not out as of yet.
To help you answer that question, here is a simple guide for you:
- If you are using Windows PC to Zwift:
- If you are using a Mac:
- If you are using iPad, iPhone or Apple TV, you need a Bluetooth footpod:
I would recommend getting a Bluetooth footpod regardless of the hardware you use to run Zwift. With Bluetooth, you will have the ability to use it with your mobile device if you decide to use Zwift on a gym treadmill for example and run with your iPhone or iPad.
HOW TO ENABLE THE RUN MODE
Next, you will need to download and setup your Zwift account. Zwift offers free 7/days trial and then it’s $15/month.
Next time you log in, you will find the running mode in the PAIRED DEVICES menu. Click on a search under the Run Speed icon to search for your footpod.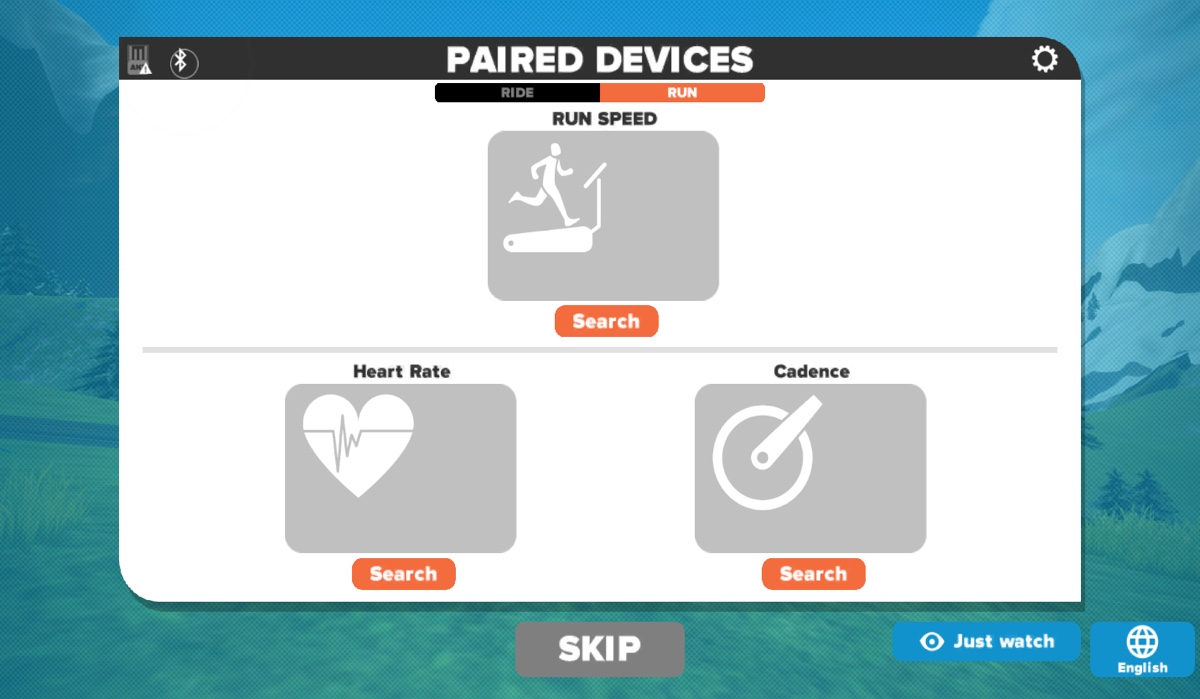
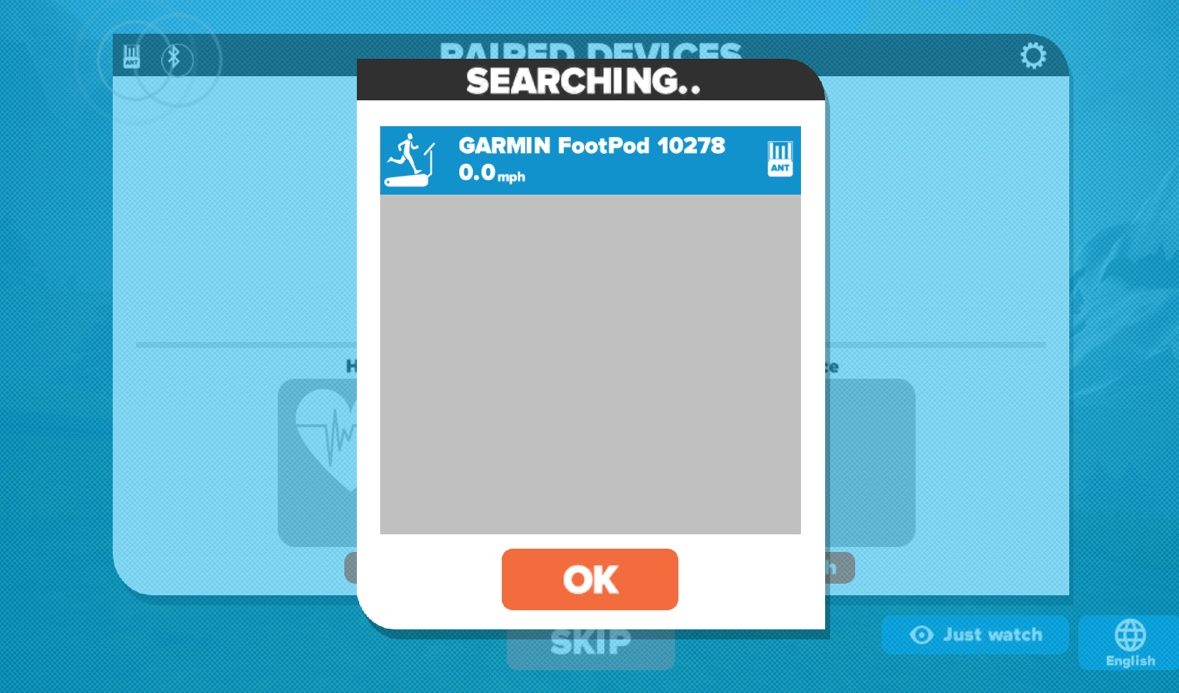
Make sure your footpod is awake by basically walking around. You should see the footpod in the search results:
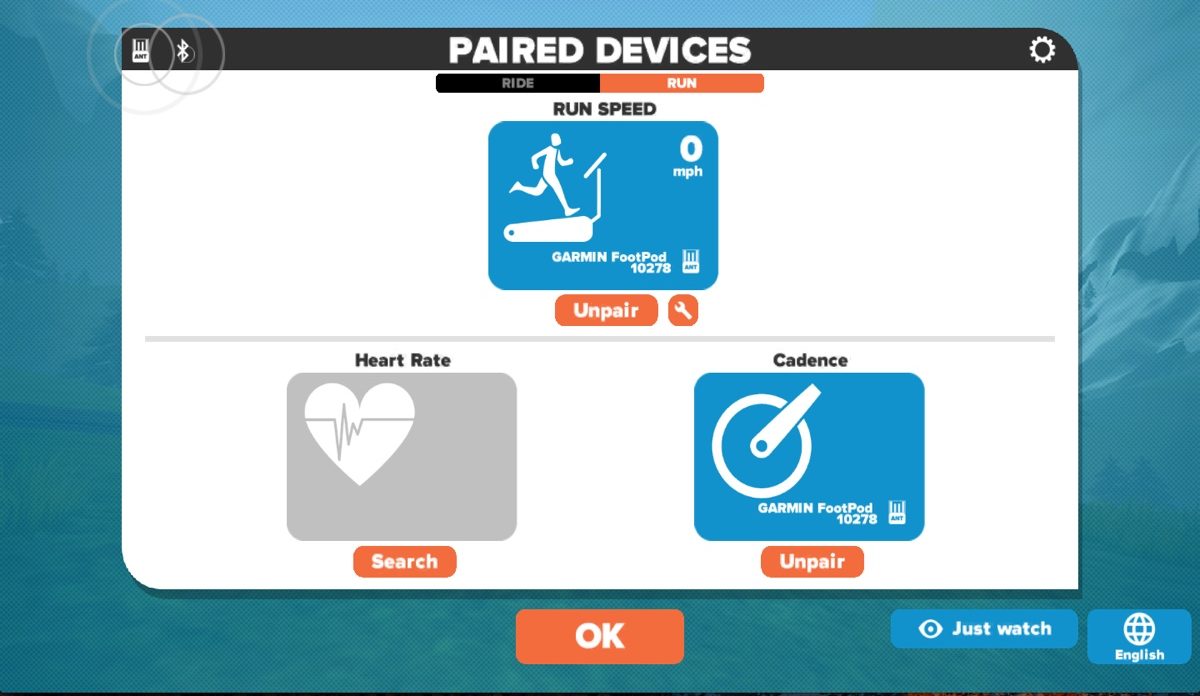
Next, you should calibrate your footpod. You can do so by clicking on the little gear icon next to the Unpair button under your footpod
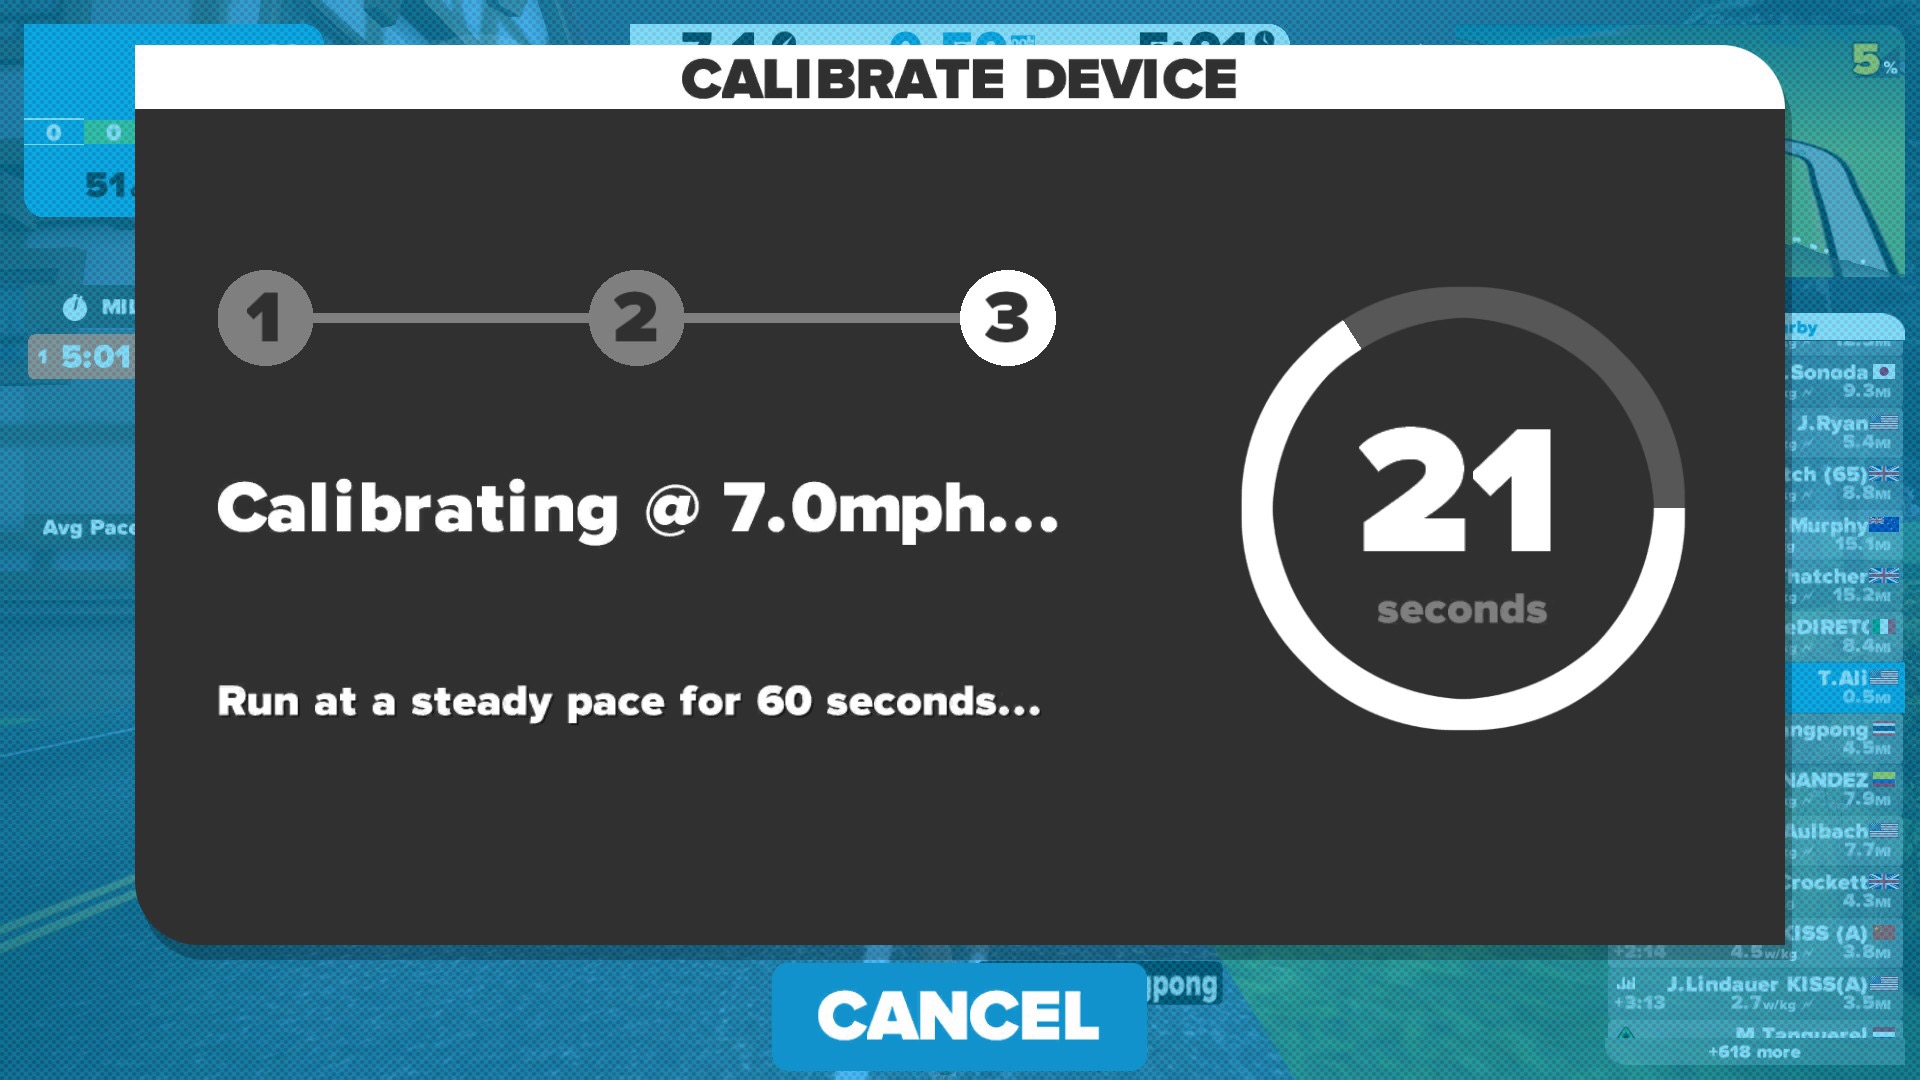
You will be prompted to select your running speed. Basically, you set the treadmill speed on that speed and run a steady pace for about 60 seconds. Zwift will calibrate your footpod to match your treadmill speed or come very close to it.
Now you are ready to start running. Click on OK. Now you can select the course you want to run on. Click on Ride and Zwift will place you somewhere on the course. You can now begin your run and your avatar will start running as you are running.
CUSTOMIZE YOUR AVATAR
From the Menu, click on Customize or hit the T key on the keyboard. The User Customization options screen will appear. Here you can change your outfit, glasses, hair, socks, shoes, skin tone, etc. Once you are satisfied with the way you look, click on ok and your running avatar will update.

For now, you might see few runners on the course but you will most likely be running with a bunch of cyclists all around you. As the running mode grow, I think this will be a good way to get us distracted and take the monotony out of running indoors just as it did with cycling.
COMMUNITY SUPPORT
For help and some support, check out the Facebook Zwift Runners community. The Strava Runners club is also a good place to join. Sometimes runners get together for a virtual group run.